Introduction to EVE-NG
This lab is intended to introduce the basic operation of EVE-NG, a network emulation, environment. This will be done using a familiar topology. This will allow you to focus on EVE. Along the way you will pick up the differences between EVE and Packet Tracer. This is a full-fledged network emulator that will run virtual machines for each device with the actual Cisco IOS running on it. This is as close as you can get to configuring real hardware without the equipment. That means there will be no way to watch the packets travel and troubleshooting will be require careful, methodical approaches.
To complete this lab you need:
- Access to a server running the EVE emulation package.
- Provisioned for you by the School of IT if you are taking a relevant unit at Murdoh University.
- The EVE-NG client integration package installed on your computer.
- Already configured on your lab computer.
If completing this lab at home:
- The EVE-NG client package needs to be installed on your computer.
- You need to be connected to the EVE data-centre network via the VPN to be able to access your EVE instance. You should have received VPN detaills in an email. Check your junk mail or your University provided address if you do not have this.
Learning Objectives
At the end of this lab you should be able to:
- Access your EVE virtual machine located in the data centre.
- Learn how to work with lab files in the EVE environment.
- Configure devices for a familiar topology in EVE.
- Establish a terminal session to the simulated devices.
EVE consists of a client and a server
Unlike application packages such a Packet Tracer, EVE-NG runs on a server. You configure labs using a web browser such as Firefox and connect to the server using its IP address.
This lab assumes that the you will be using the server provided to you by the University. But it is possible to obtain your own copy of the Free EVE Community Edition server and run it on your own computer if your computer has sufficient RAM and CPU performance.
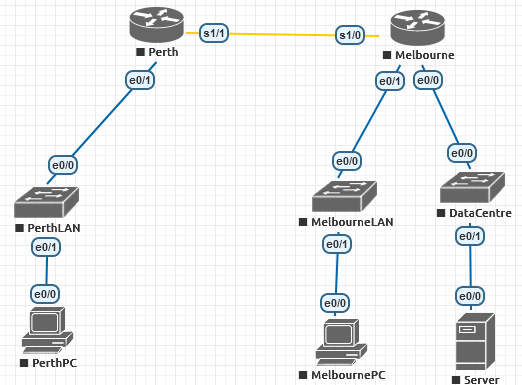
Topology
Steps
Step 0 - Logging into the Data-Centre
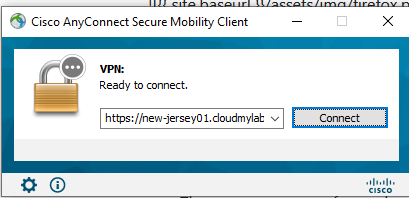
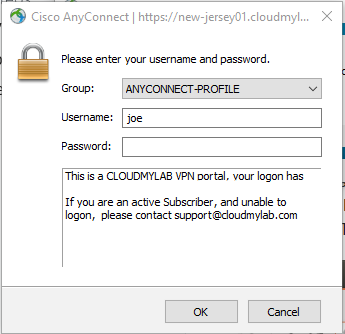
Before you can login to your EVE instance you must first use a VPN to connect to the data-centre.
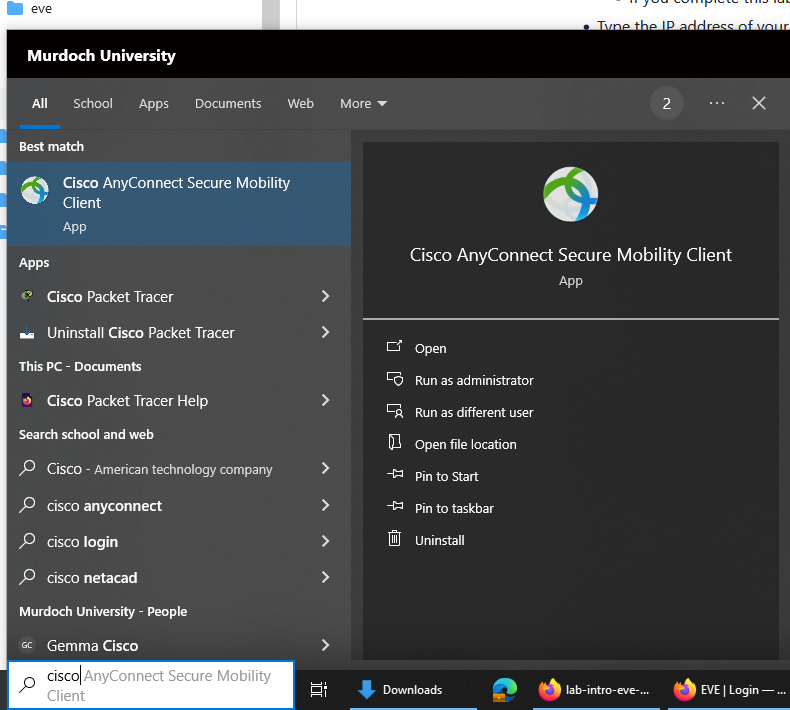
- In the University lab search for Cisco Anyconnect.
- Use the username and password provided to you to connect. If you do not have a username and password, and are enrolled in the unit, please contact the Unit Coordinator.
If you are using a laptop you will first need to install anyconnect using This guide - Once you have logged into the data-centre using the VPN you are now ready to access your EVE-NG server.
Step 1 - Access the server
As part of the class setup, you should have received an email with the IP address and username/password for your EVE-NG server. If you do not have this, please contact your unit coordinator.
Open a browser
- In the University lab you should use Firefox as this has been configured for use with EVE.
- If you complete this lab at home it should work with most browsers (As long as you install the EVE-NG client package).
- Type the IP address of your server into the URL/search field in your browser and press ENTER.

Step 2 - Logging in
-You should see the login screen for EVE.
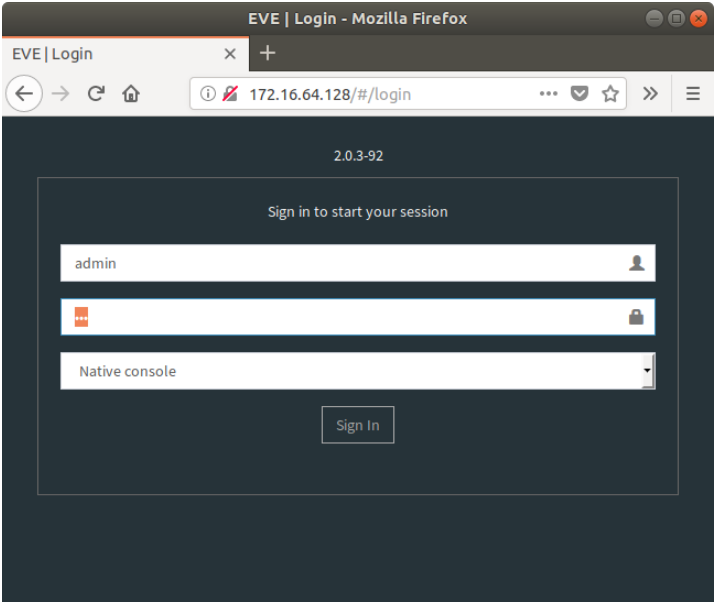
- Login with the username and password provided to you in the email.
- There are two types of console:
- HTML5 - works on all computers withut additional software. However, some features such as copy and pasting can be awkward.
- Native - Only choose this if your computer has a terminal program such as Putty installed (Murdoch IT lab computers do). If you are working on your own PC you need to install the “EVE windows integration pack” (Google).
Step 3 - Downloading a lab from the LMS and uploading it to EVE-NG
-You are now in EVE and this will be the starting point for many future labs in this unit.
For all of the tutorials going forward you will need to download a topology and upload it to EVE. This will be explained in the tutorial but for reference there is a video that shows the process below.
This is a video guide to uploading a lab
Briefly the steps are:
- Navigate to the “EVE topology files” section on the left hand navigation block of the lab page.
- Click on “initial.zip” to download it.
- In EVE click the import (downward arrow) button, and select the initial.zip file contained in your downloads folder.
- this bit is odd The file you opened now appears in the top section of the screen with a green upload button. Click on it.
- The lab name now appears in the clickable file list. It will remain available until you delete it.
- Click on the lab name “Subnetting initial.unl”.
- A preview of the lab appears and you open the lab with the open button at the bottom of the screen (scroll down if it isn’t visible).
Step 4 - Start the nodes
- Once you’ve opened the topology you need to start the nodes. They will change from grey to blue once they are started.
- On the left hand menu find the nine square dots option.
- Select “Start all nodes”
- Now you are ready to begin configuration
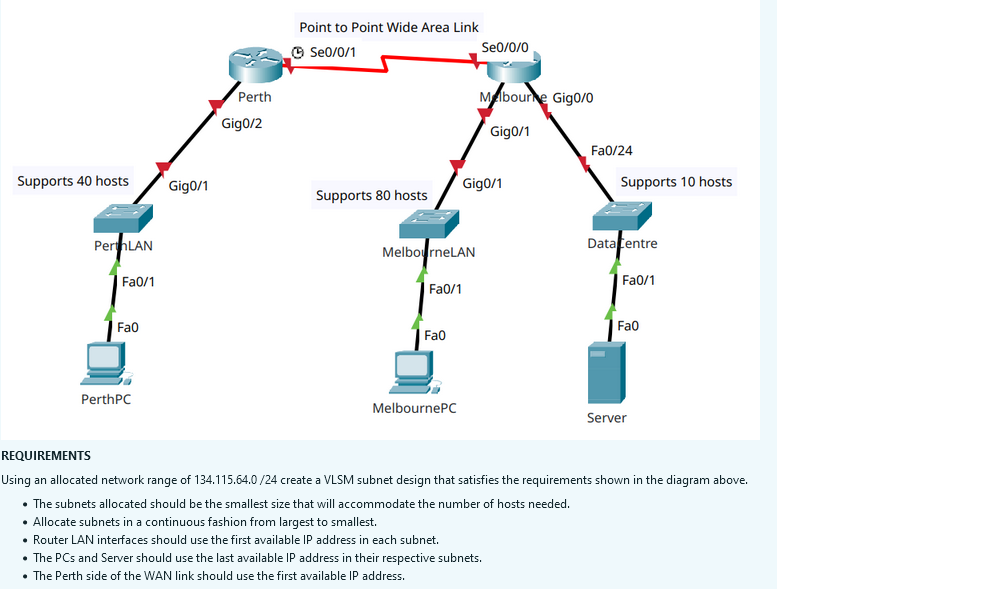
Step 5 - Design the IP addressing scheme for the network
- Using the topology below. Design a VLSM subnetting plan and use it for implementation. It should be just like last weeks. If you have not done last weeks lab you can go back and complete it prior to do the subnetting here.
Step 6 - Configure routers
- First configure routers by clicking on them and open a terminal. Remember to say no to initial configuration dialog.

- Important do not configure the passwords or secret for the routers in EVE. It sometimes causes problems later.
- Steps for configuring the router
- First configure the hostnames
- Configure the interfaces
- ip addresses
- no shut
- Configure static routes
- Use the show commands to view your configurations
- show ip int brief
- show run
- show ip route
Step 7 - Configure end devices
These PC’s are different from the PC’s in packet tracer. Because the virtual PC’s that are available in EVE are limited in their capability we are just using routers with a different image. So, even though it looks like a PC or a server you will need to use the same commands to configure the device as you would a router.
- Configure the hostname for the PC and Server.
- Configure the interface for the device.
- To set the default gateway you will need to use the following commands:
no ip routing  (tells the router not to forward packets.  This makes it behave like a node)
ip default-gateway [gateway address]
Step 8 - Test the network connection.
Once you have configured all of the devices, including the routing, you should now be able to ping across from the PerthPC to the MelbournePC and Server.
Welcome to EVE-NG